How To Make Your First Sourdough Bread

Sourdough feels quite magical. It only contains the most basic ingredients, and yet the end result is full of flavour and complexity.
The recipe below might look daunting at first, but it’s not as complicated as it seems. Once you give it a go and make your first successful loaf, you won’t look back!
Baking bread has now become part of our weekly routine. We try to bake on the same day each week (we prefer Saturdays—choose a day that works for you and try to stick to it!). That way you can plan for your starter to be ready exactly when is needed.
The process feels very relaxing and meditative—almost like a personal mantra. And you will love the taste, texture and smell of freshly baked sourdough!
We’d advise you to read the instructions in full before you attempt this recipe for the first time. It will help you understand the process and, more importantly, allow you to plan the timings—the whole process takes about 24 hours, but you can easily fit it around your daily commitments.
Ingredients
YIELDS 2 SMALL LOAVES
TOTAL TIME: 24 hours using active starter
SPECIAL EQUIPMENT: Dutch oven (cast iron dish with a lid), proofing baskets/bannetons

LEVAIN
35g active starter
70g water (27°C/80°F)
70g strong whole wheat flour
NOTE: You will only need 140g of the levain for this recipe. The remainder of the levain (35g) can be used as your new main starter.
DOUGH
140g levain
500g strong white bread flour
200g strong whole wheat flour
480g water (27°C/80°F)
14g fine salt
10g water (27°C/80°F)
Rice flour, for dusting the bannetons/baskets
Steps
STEP 1
To make the levain
The day before baking, in the morning, mix the 35g active starter* with 70g warm water and stir to combine. Add 70g whole wheat flour and mix until fully incorporated. Cover with a lid and leave at room temperature for about 5-6 hours. At this point, the levain should at least double in size and it should smell quite sweet.
Before you move to the next step, your levain should be bubbly and increase in volume. For best results, use it when it is at peak. Be patient, if you haven't achieved that in the specified time, wait a little longer.
*An active starter is a starter that is fully ripe and ready to use (it should be at its peak). If you follow our starter recipe, the starter should be ready to use at 8am (12 hours since the last feeding).
STEP 2
Make the dough
In a large bowl, combine 140g levain with 480g water (27°C/80°F) and stir to combine.
Add 500g strong white flour and 200g whole wheat flour to the levain/water mix and, using your hands, combine until the flour is incorporated. The dough will be very sticky at this stage. Cover the bowl with a towel and let the dough rest at room temperature for 30 minutes.
STEP 3
Add 14g salt and 10g water and use your hands to thoroughly incorporate the ingredients into the dough. Knead for a few minutes until it’s smooth and supple.
Cover the bowl with a towel and leave it at room temperature for another 30 minutes.
STEP 4
From here on, wet your hands before you handle the dough (this should prevent the dough from sticking to your hands).
You will now perform four stretch & fold sets.
To perform the first stretch & fold, hold the dough on one side and stretch it up as far as you can, without ripping it off. Then fold that stretched piece over the rest of the dough. Rotate the bowl 90 degrees (a quarter turn) and repeat this action 3 more times (stretch one side as far as you can and fold it over the rest of the dough, then turn again 90 degrees). One stretch & fold set is completed after you stretch the dough four times, turning the bowl a quarter turn each time. Once you complete the first set, let the dough rest for 30 minutes.
You will need to perform 3 more stretch & fold sets, resting the dough for 30 minutes between sets.
After each 30 minute rest, you will start noticing how the dough is changing its texture. At first it will be quite tough and stiff, but with each additional 30 minute rest the dough will become softer, it will increase in volume and more bubbles will start forming. At the end of the cycle you should be able to stretch the dough quite far away from the bowl.
Once you have completed the four stretch & fold sets, leave the dough to rest for another 1-2 hours. The dough is ready when it has increased in volume by about 80%-100%.
You can use the windowpane test to confirm if the dough is ready. For this test, gently lift up a piece of the dough with both hands and stretch it between your fingers. If you can stretch it thin enough without it ripping until it’s almost translucent, the dough past the test.
STEP 5
Once the dough is ready, transfer it onto a work surface and dust the top of the dough with a little bit of flour. Using a dough scraper, cut it in half and gently shape each part into a round. This step is called pre-shaping. Cover with a towel and let rest 20 minutes. This is the bench rest.
STEP 6
While the dough is resting, dust your proofing baskets or bannetons with rice flour.
For the dusting, I strongly recommend using rice flour rather than plain flour. Rice flour will prevent the dough from sticking to the basket/linen, helping the dough come out of the basket with ease after the overnight proof.
STEP 7
After the 20 minute bench rest, dust the top of the rounds with some flour (this will be the top of the bread—the crust). Flip the rounds over, so floured sides are facing down. We will now perform the final shaping.
Take one of the rounds and, starting at the side closest to you, pull the dough down toward you, then fold it up and over the middle of the dough. Repeat this action on the right, pulling the side out and folding it up and over the centre. Then do the same for the left side. Finally, lift the side farthest from you and fold it over the previous folds. Flip the dough over (the floured side up) and shape it into a smooth, tight ball. Repeat the process with the other round.
STEP 8
Flour the top of each round with a little bit of rice flour and transfer them to the prepared baskets (the floured side facing down). Cover with a towel (or place them in a plastic bag) and let the dough rest for about 12 hours in the fridge. This is called cold proof or cold retard.
STEP 9
The following morning, place the Dutch oven (cast iron dish with a lid) inside the oven. About 1 hour before baking, heat up the oven to 250°C/480°F.
To ensure that the Dutch oven is heated up evenly (inside and outside), place the pot and the lid of the Dutch oven on different levels inside the oven. Alternatively, place the lid on top of the pot, but making sure that they don’t overlap completely (leaving a gap between them), to let the hot air flow inside the Dutch oven.
STEP 10
Remove the first loaf from the fridge and place a sheet of parchment paper on top of the basket. Gently flip the basket upside down and place it on your work surface, leaving the loaf on the parchment paper. To help the bread fully expand in the oven, slash the dough with a lame (a baker’s blade).
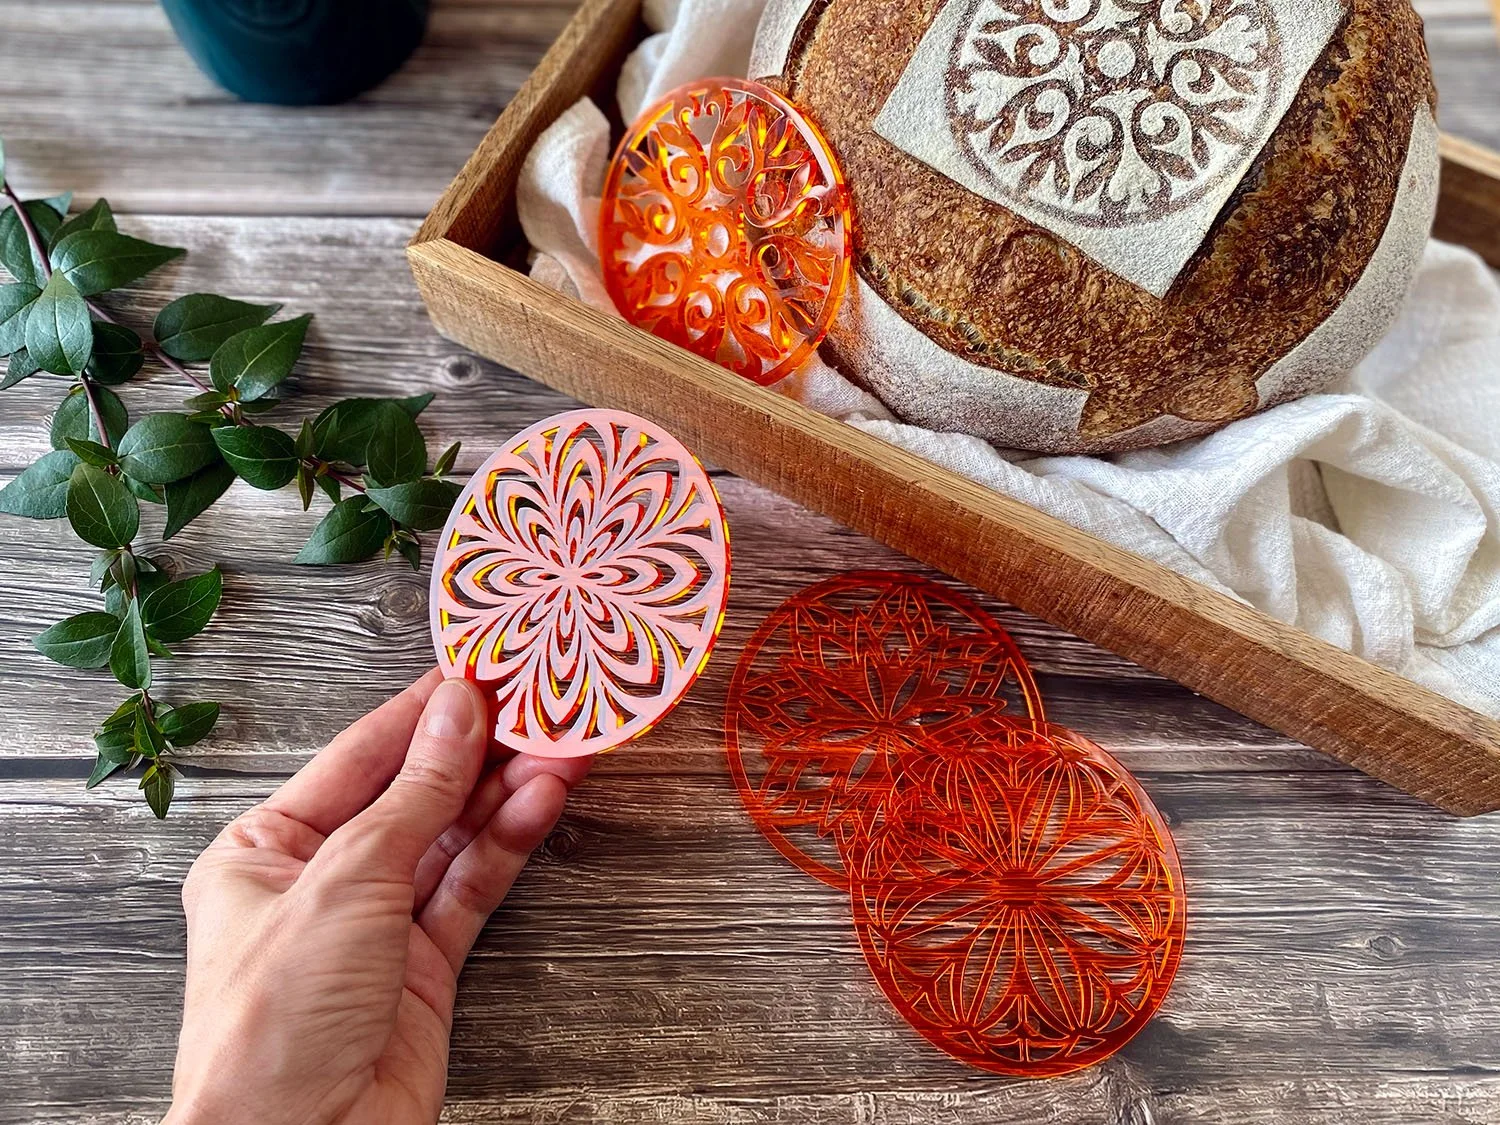
NOTE: To help the bread expand, simply slash the loaf, or use your imagination to create unique and interesting patterns, making the sourdough bread even more special. For inspiration, check our bread art section.
Very carefully, remove the heated Dutch oven from the oven and place the loaf into the pan. Cover with the lid and transfer back to the oven. Bake at 250°C/480°F for the first 25 minutes.
Reduce temperature to 230°C/450°F, remove the lid (take extra care as there will be very hot steam coming out of the Dutch oven!) and bake for an additional 15 minutes or until the crust becomes golden brown.
STEP 11
Transfer the bread to a wire rack—the bottom of the loaf should sound hollow when tapped. Cool for at least 1 hour before slicing.
Place the Dutch oven back inside the oven. Increase oven temperature to 250°C/480°F and repeat the process with the second loaf.
TIMINGS (Guide only)
NOTE: Timings may vary depending on the temperature of your kitchen, flour(s) used, how strong is your starter and other factors, so use the below notes as a guide only and use your judgement when it comes to the various steps described. (Also note that in winter months, your kitchen may be considerably cooler, so proofing may take longer).
9.00am Prepare levain
3.00pm Mix levain with flour and water
3.30pm Add salt and 10g water
4.00pm #1 stretch & fold
4.30pm #2 stretch & fold
5.00pm #3 stretch & fold
5.30pm #4 stretch & fold
7.30pm Preshape and bench rest
8.00pm Shape and put in the fridge for overnight cold proof
8.00am (next morning) Turn on the oven
9.00am Score and bake

Tips
How do I clean my hands and my tools? After mixing the flour with water and levain in step 2, you may have quite a lot of dough on your hands. Wet your hands and wipe them with a paper kitchen towel to get rid of most of the dough, and then wash your hands thoroughly. If you don’t use a paper towel first before washing your hands in the sink, the dough may end up clogging your pipes (if you do this regularly). Same goes for all the bowls and other tools you will use when making sourdough—it is best to wipe as much of the dough as possible with a damp paper towel, and then wash the tools under the sink or in the dishwasher.
What if I don’t have a Dutch oven? A Dutch oven helps retain the steam created when baking bread, and steam is very important in bread baking. It will not only enable the bread to rise, but it is crucial in creating the beautiful crust and taste of your bread.
If you don’t have a Dutch oven, you can create the steam by placing a small loaf tin with some water inside the oven. WARNING: There will be very hot steam trapped inside the oven, so be very careful when opening the oven door.
What if I don’t have a proofing basket or banneton? We strongly suggest you get a proofing basket, but if you don’t have one, you can use a bowl lined with a tea towel. Make sure you dust the towel and the dough with some rice flour before placing the dough inside.
What should I use to slash the dough before placing it in the oven? To help the bread fully expand in the oven, you need to slash the dough before baking. You can try with a very sharp knife, but it is better to use a lame (a baker’s blade). For most of our scoring we use Wire Monkey lames de boulanger. They are super functional, high quality and beautifully made. Wire Monkey offers several different models to choose from—you can find the full range here. Using our link you’ll get a 10% discount from their store.
Too much bread? This recipe yields two loaves. We usually give any extra loaves to friends and family—but remember, you can also freeze some of the bread for another day!
Bonus tip: We highly recommend keeping a record of your process, timings, ingredients and techniques used.
Our Sourdough Fever Record Keeping PDFs will help you do all that and more. This 4-page PDF file includes a record keeping page, a basic sourdough recipe with instructions and troubleshooting notes that you can download and print at home. Click the photo below to find out more!

You may also like to our custom-built Baker’s Percentage Calculator. With our intuitive design, and instant results, you will be able to easily work out grams or percentages of your sourdough ingredients.
Get access to the calculator.

And if you want to make your loaf extra special, check our NEW Sourdough Fever Stencils!
RELATED POSTS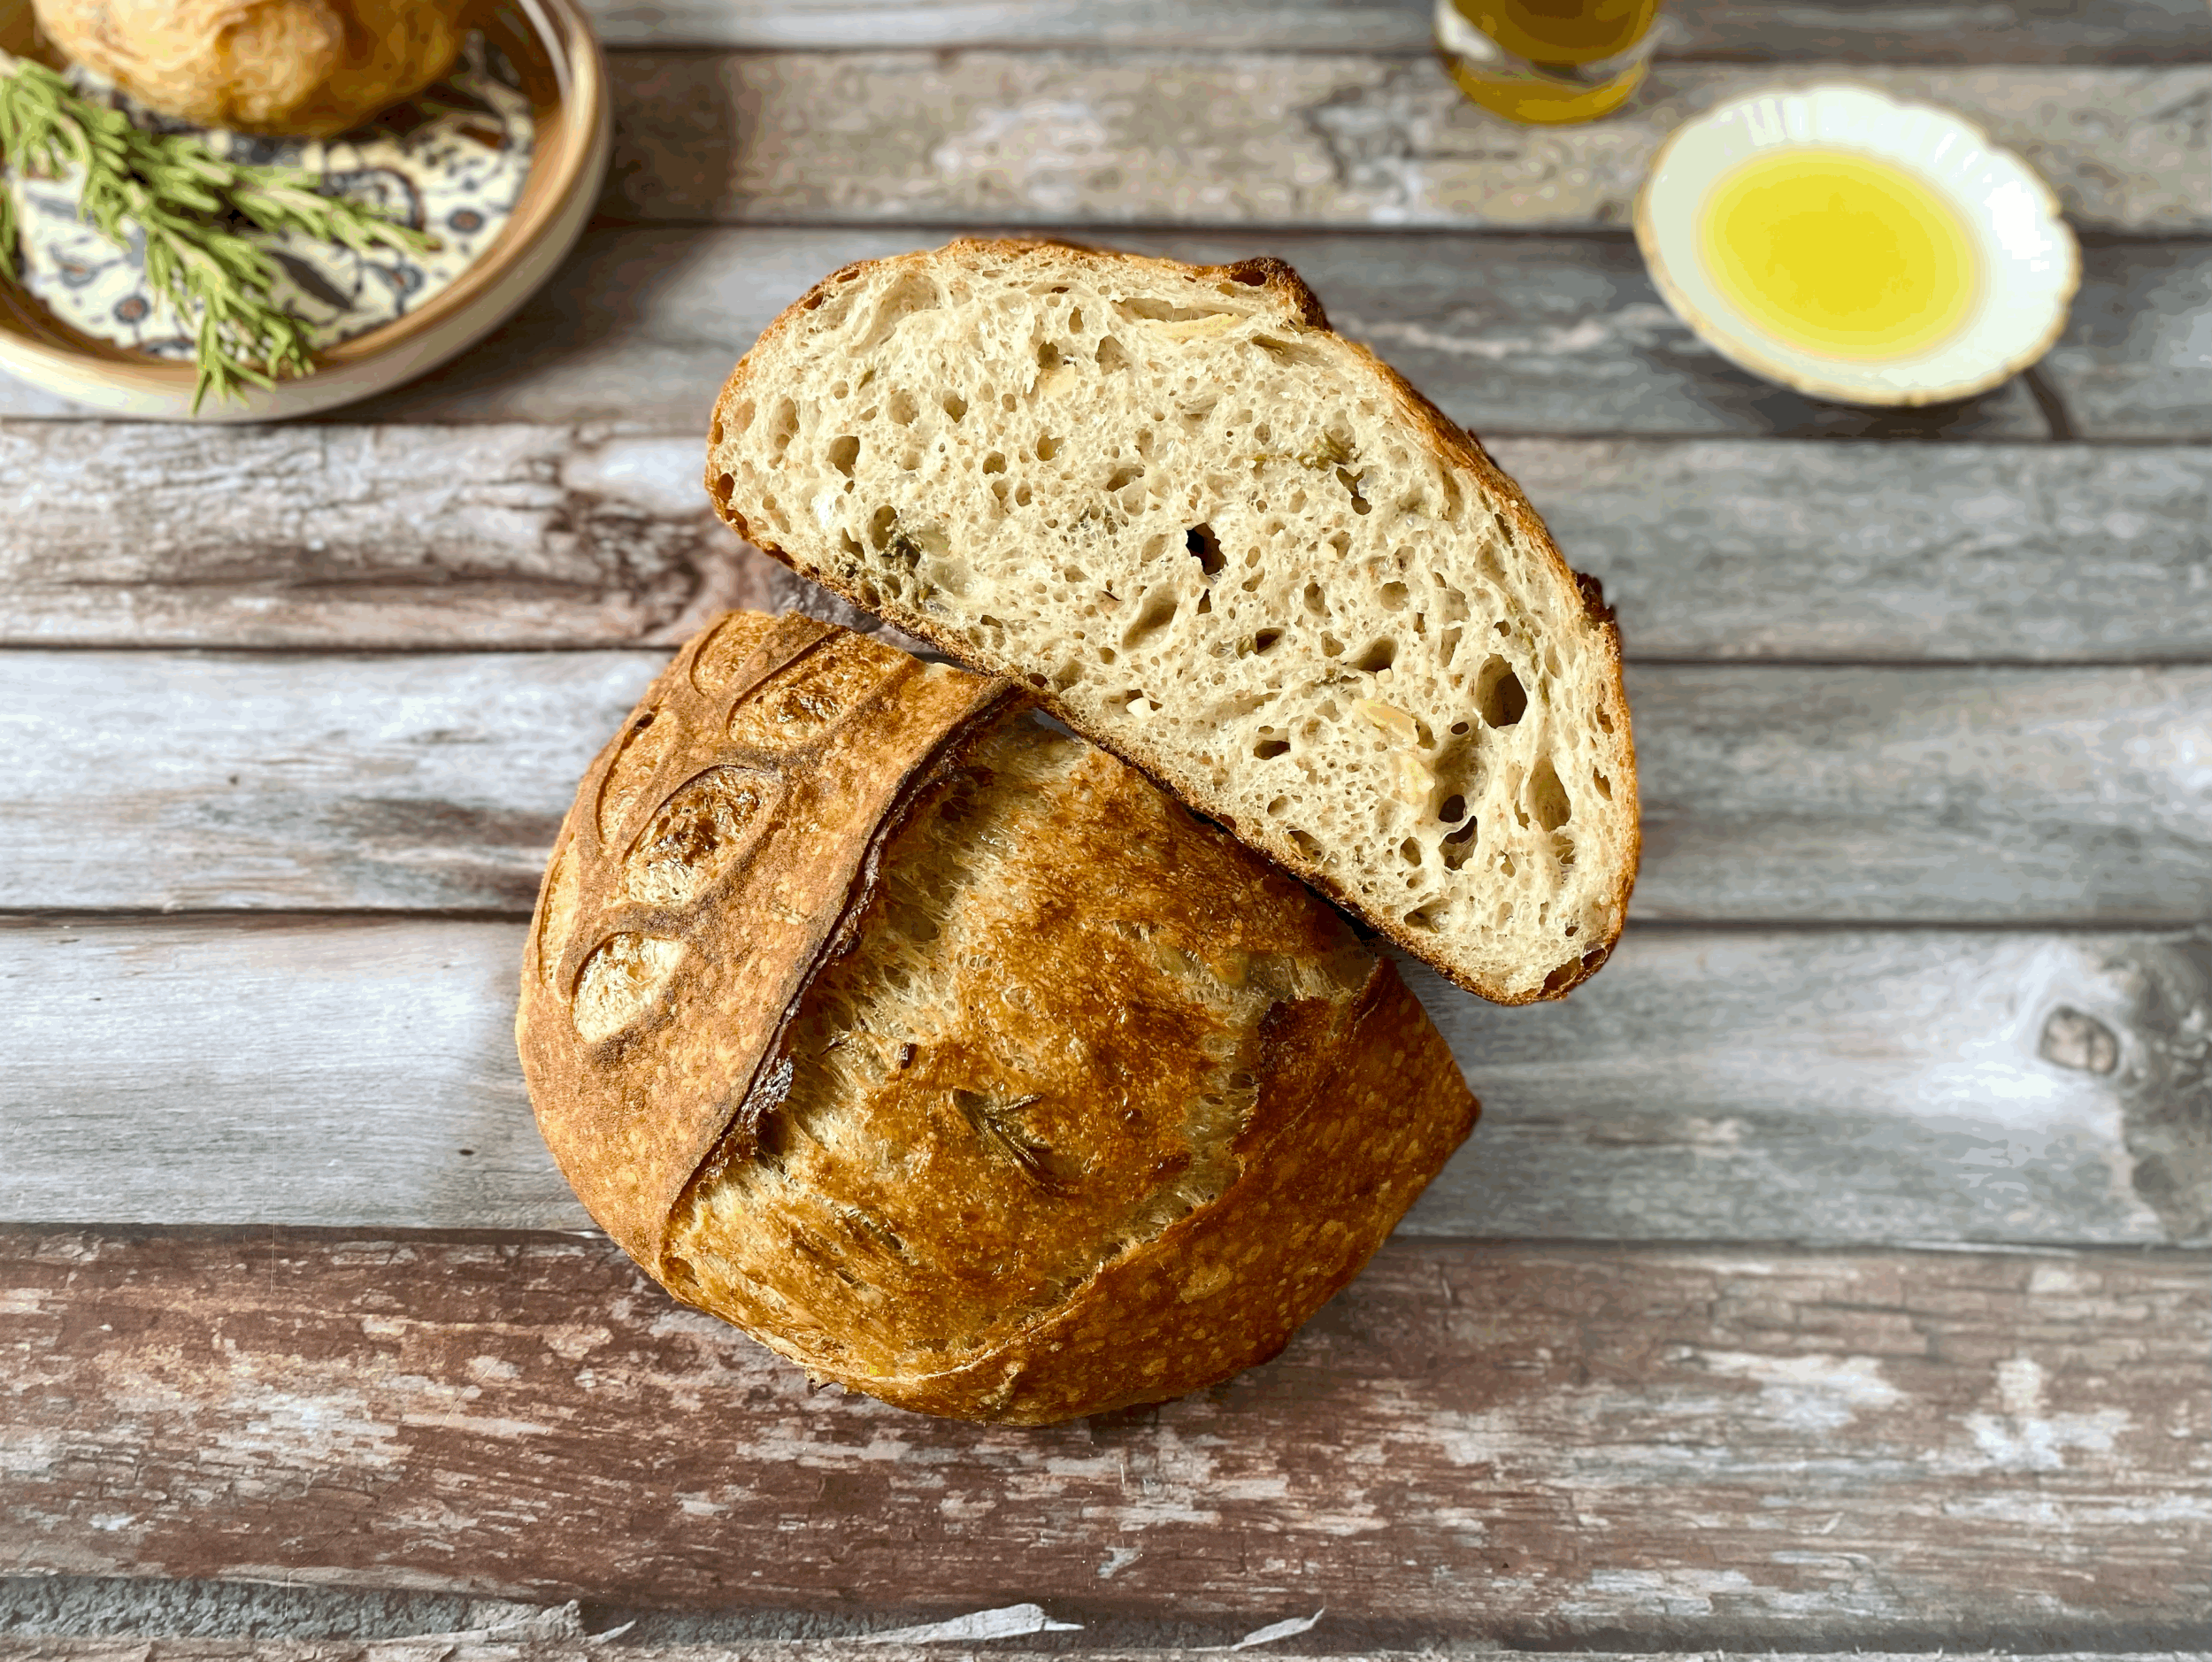


Focaccia is one of the most satisfying breads you can bake at home. With its crisp golden crust, pillowy crumb, and generous drizzle of olive oil, it’s a showstopper that’s surprisingly easy to make. What makes sourdough focaccia even more special is the added depth of flavour: the gentle tang of a natural starter balances perfectly with sweet or savoury toppings.