Sourdough FAQs
FLOUR
What flour should I use?
For sourdough making, it is best to use flour that is high in protein content (at least 12%) rather than regular all purpose flour. The flour might be called differently around the world—white bread flour is usually referred as ‘bread flour’ or ‘strong flour’. The word ‘strong’ is typically used when the flour is high in protein—as a general rule, the higher the protein content, the stronger the flour. Strong flour helps gluten development, which in turn helps the dough to rise in the oven and produce an open crumb.
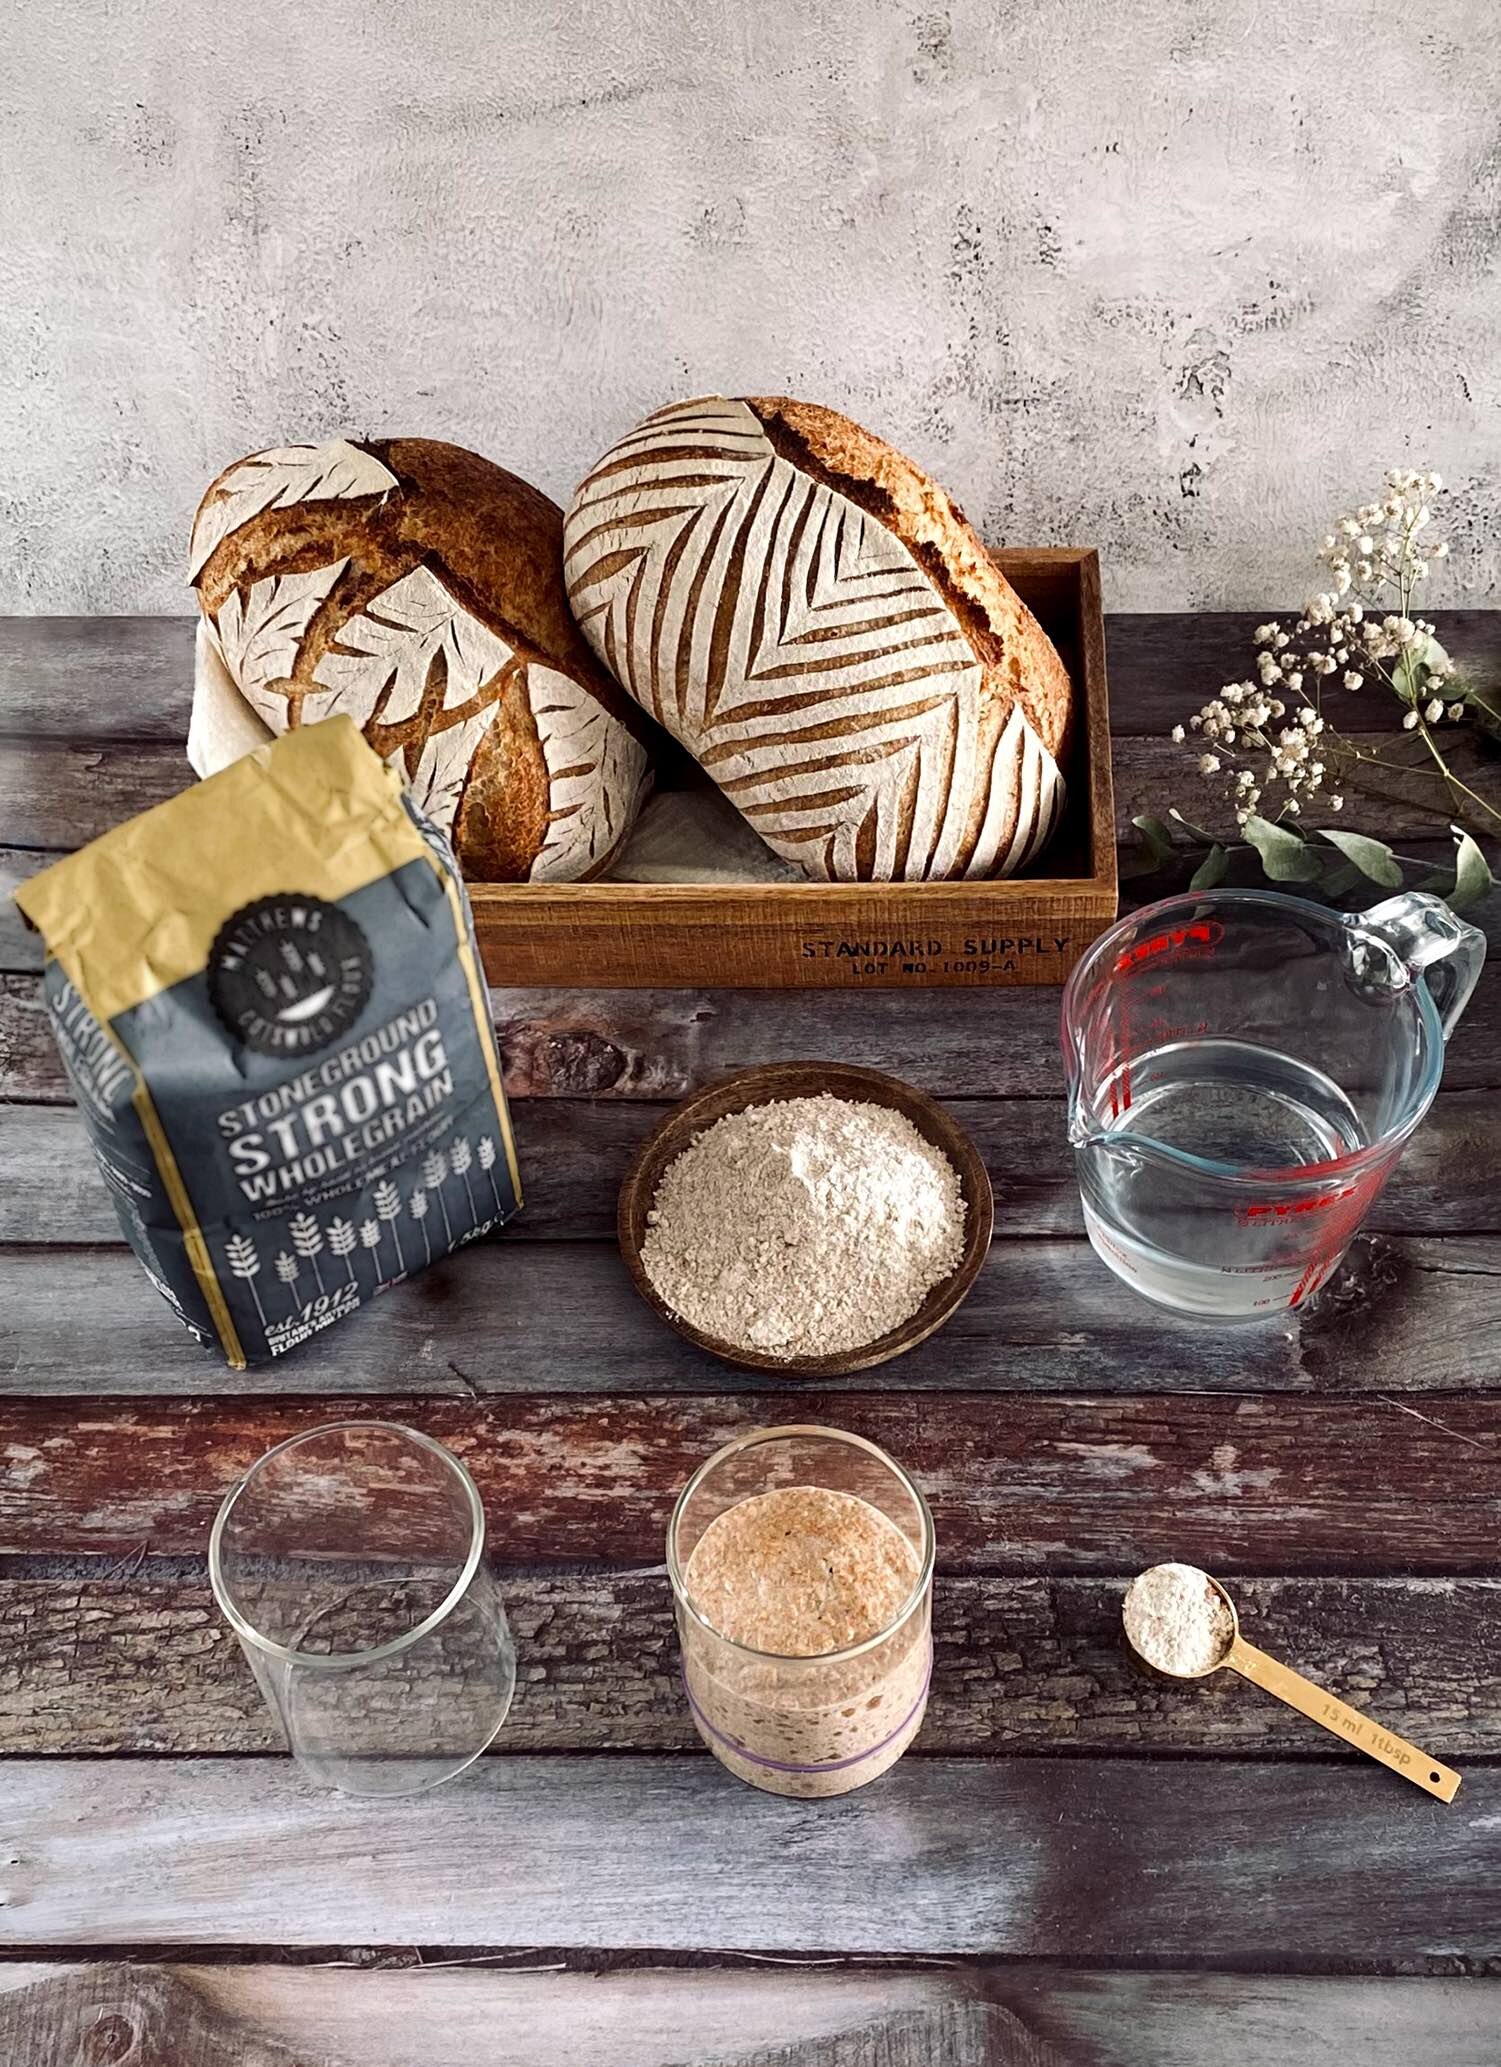
In addition to or instead of white ‘bread flour’ you can use wholegrain/wholemeal, rye flour and many other types. Each flour will produce a slightly different flavour, texture and consistency of your bread. Each will absorb water differently—for example, wholegrain will absorb more water than white flour, so the consistency of your dough and the crumb may be different, even if the hydration (the amount of water in the dough) stays constant. If you’re new to sourdough bread baking it is best to use the same type of flour at first, until you get familiar with your bakes. And then you can start experimenting with different flour types and flavours.
STARTER
When is my starter ready to use?
If you are building your starter from scratch, you will need to wait for at least 5-7 days before the starter is ready to use. Check How To Make A Sourdough Starter From Scratch to find out more.
As a general rule, your starter is ready to use when it has at least doubled in size since the last feeding and it is at its peak. The time required to reach its peak or to double in size will depend on the flour used, the temperature of your kitchen, but most importantly on the ratio of flour and water you fed your starter with. For example, a starter fed 1:1:1 will reach its peak faster than when fed using a 1:4:4 ratio (and that is starter:flour:water). For more information on this topic, check our starter maintenance article.
If you are unsure whether or not your starter is ready to use, you can try the flow test. To do the test, take a spoon of starter and drop it in a cup of tepid water. If the starter floats, it is ready to use. The test is not always accurate, but in most cases it’s a good indication on whether your starter is ready to use.
What’s the difference between a starter and a levain?
As you will see in sourdough bread recipes, these two terms are often used interchangeably. In essence it is the same thing, but if you use a levain, you can change the profile of the bread to be more or less sour or you can build your levain using a different flour, keeping the starter unchanged.
A levain, also called a leaven or levain starter, is a bigger, younger version of your sourdough starter. It is typically prepared on the day when you want to mix your sourdough and contains a small part of a ripe starter, together with a larger part of fresh flour and water. As with the starter, you will need to wait several hours after you mix your levain, before it is ready to be added to your dough. It is typically added as a whole batch when making sourdough.
When to discard your starter?
If your starter shows visible signs of mould—or it develops a pink or orange colour—throw it away. Equally, if the smell is not the usual sweet or acidic aroma, and it is quite unpleasant, throw it away.
Why discard so much of the starter?
For best results, your starter needs to be fed, at the very least, using the 1:1:1 ratio (starter:flour:water). This means that the amounts will quickly become very large if some of it is not discarded. Imagine that you have 100g of starter; if you don’t discard anything, in your next feeding you will need to add at least 100g flour and 100g water, which will give you a fresh starter of 300g. This will quickly grow to 900g and so on. So keep it to the minimum.
Instead of discarding your starter, you can store all or some of the ‘discard’ in a separate container in the fridge. It may be kept unfed for about a week and can be used in a recipe that calls for a discard, such as our delicious brownies recipe. Sorted!
How to increase the amount of the starter?
If your recipe calls for a quantity of starter that is bigger than what you usually keep, you can increase the amount by feeding it without discarding anything, until you achieve the required amount. If you feed using the 1:1:1 ratio, and your starter is say 50g, you will need to add 50g of flour and 50g of water. This will give you a new starter that is 150g. If you require more, you can use a higher ratio, for example 1:2:2, which will be 50g starter : 100g flour : 100g water.
What if I forgot to feed my starter?
If you keep your starter at room temperature and you forget to feed it once or twice, you should be able to revive it. Just feed it as soon as you remember, and try not to use it in baking for at least a couple of days, or until the starter is fully active again.
If you forgot the starter in the fridge, as long as it doesn’t smell very bad and is not moldy, you should be able to revive it. Just feed it as soon as you remember—if it starts bubbling after a couple of hours, it means the starter is still ‘alive’. Feed it a couple of times at room temperature to make sure the starter is fully active, before you use it again or place it back in the fridge.
TOOLS
What if I don’t have a proofing basket or banneton?
We strongly suggest you get a proofing basket, but if you don’t have one, you can use a bowl lined with a tea towel. Make sure you dust the towel and the dough with some rice flour before placing the dough inside. Rice flour is better than all purpose or bread flour as it doesn’t stick to the basket or liner as much. You can read more about proofing baskets here.
What if I don’t have a Dutch oven?
A Dutch oven helps retain the steam created when baking bread, and steam is very important in bread baking. It will not only enable the bread to rise, but it is crucial in creating the beautiful crust and taste of your bread.
If you don’t have a Dutch oven, you can create steam by placing a baking tin with some boiling water inside the oven, while the oven is still preheating, about 15 minutes before you bake your bread. Keep the tin (with water) inside the oven for the first 20 minutes of bread baking, then remove the tin and continue with your baking for an additional 20 minutes.
WARNING: When using the ‘tin with hot water’ method, apply extreme caution—there will be a lot of very hot steam trapped inside the oven, so be very careful when opening the oven door.
How do I clean my hands and my tools?
When initially mixing flour and water, you may have quite a lot of dough on your hands. After your first mixing, wet your hands and wipe them with a paper kitchen towel to get rid of most of the dough, and then wash your hands thoroughly. If you don’t use a paper towel first before washing your hands in the sink, the dough may end up clogging your pipes (if you do this regularly). Same goes for all the bowls and other tools you will use when making sourdough—it is best to wipe as much of the dough as possible with a damp paper towel, and then wash the tools under the sink or in the dishwasher.
In the later stages of your dough handling—when performing stretch and fold, coil folds, or shaping, always wet your hands before handling the dough—this will prevent the dough from sticking to your hands.
DOUGH
Should I autolyse?
Autolyse is a process in which you mix flour and water and let it rest before any other ingredients are added. The purpose of this process is to encourage certain chemical reactions (autolysis) that will benefit your sourdough bread. During autolyse, the water hydrates the flour, which in turn activates enzymes that help the dough become stronger and extensible. It also helps convert starches into sugars, which is important for the fermentation process.
Using autolyse makes the dough easier to handle—easier to perform stretch and folds, easier to shape the dough, and the dough should hold the shape better. And finally, dough that has undergone an autolyse is more likely to have a better oven spring and a softer crumb.
Timings for autolyse:
White bread flour: 30 min to 3 hours
Wholegrain flour: 1 - 4 hours
If you autolyse for longer you may risk the gluten structure in the dough to break down.
Although the ‘correct’ autolyse process is done by combining just flour and water (and let it rest), many bakers, for convenience, would add the sourdough starter at the same time (together with the flour and water) to simplify the process—adding the starter at this stage will somewhat interrupt the fermentation, but the main benefits of the autolysis will still be there.
Why do we add salt after autolyse?
Salt slows down the gluten development process, therefore you need to make sure your flour is hydrated and gluten had the required time to develop before salt is added.
Why do I need to perform stretch & fold or coil fold?
Both methods are used to strengthen the dough and help gluten development. They are done at the early stages of bulk fermentation, usually performed several times in 30 min intervals. If you don't perform either of these, the dough might end up underdeveloped and may not rise in the oven, resulting in a dense, tight and uneven structure.
Stretch and fold is done by stretching the dough out and then folding it over itself. One set of stretch and fold is based on 4 stretches, by working your way around the dough in a clockwise direction.
Coil fold is similar to the stretch and fold technique, but it’s gentler to the dough as it relies on surface tension and gravity. This method is typically used in dough with higher hydration. Coil fold is done by lifting the dough with both hands from the middle, until one end releases from the proofing container/bowl. The second step is to gently lower the dough to allow the loosened end to tuck under the middle. Then repeat with the other side of the dough. The dough should look like it is folded over itself. Turn the dough 90 degrees and repeat these steps until the dough does not stretch very far anymore, and holds its shape.
When is the bulk fermentation finished?
This is probably the most crucial part of sourdough making. It takes practice to get it right as you won’t be able to fully rely on the timings specified in your recipe for this step.
Bulk fermentation may take between 3-7 hours or even longer and it will depend on various factors. Even if you follow a recipe, the timings of the bulk will be just a guide. Fermentation will depend on the temperature of your kitchen—the warmer it is, the faster the bulk will be completed. So it is likely that in summer months your dough will be ready much faster than in winter months, even if your flour is the same, hydration is the same and you use the same amount of starter.
Bulk fermentation may take longer if you use less starter/levain than what is specified in the recipe. It will also depend on the flour used, hydration level, how strong is your starter, etc. As a general rule, bulk fermentation is complete when the dough has increased in volume (about 60%-80% the volume), has visible bubbles, and is domed at the top.
The windowpane test is one of the methods used to confirm when the bulk is completed. For this test, gently lift up a piece of the dough with both hands and stretch it between your fingers. If you can stretch it thin enough without it ripping until it’s almost translucent, the dough passed the test.
Do I need to pre-shape my dough?
Pre-shaping creates tension that will help with oven spring and the overall shape of the loaf once baked. Pre-shaping will help to even out the structure of the bread, but be gentle—the dough should be domed at the top, but not so rounded that it has a lot of height. Stop shaping when the dough has a smooth surface and it’s holding its rounded shape.
Once pre-shaped, rest the dough on the counter top for about 30 minutes before performing the final shaping.
BAKING
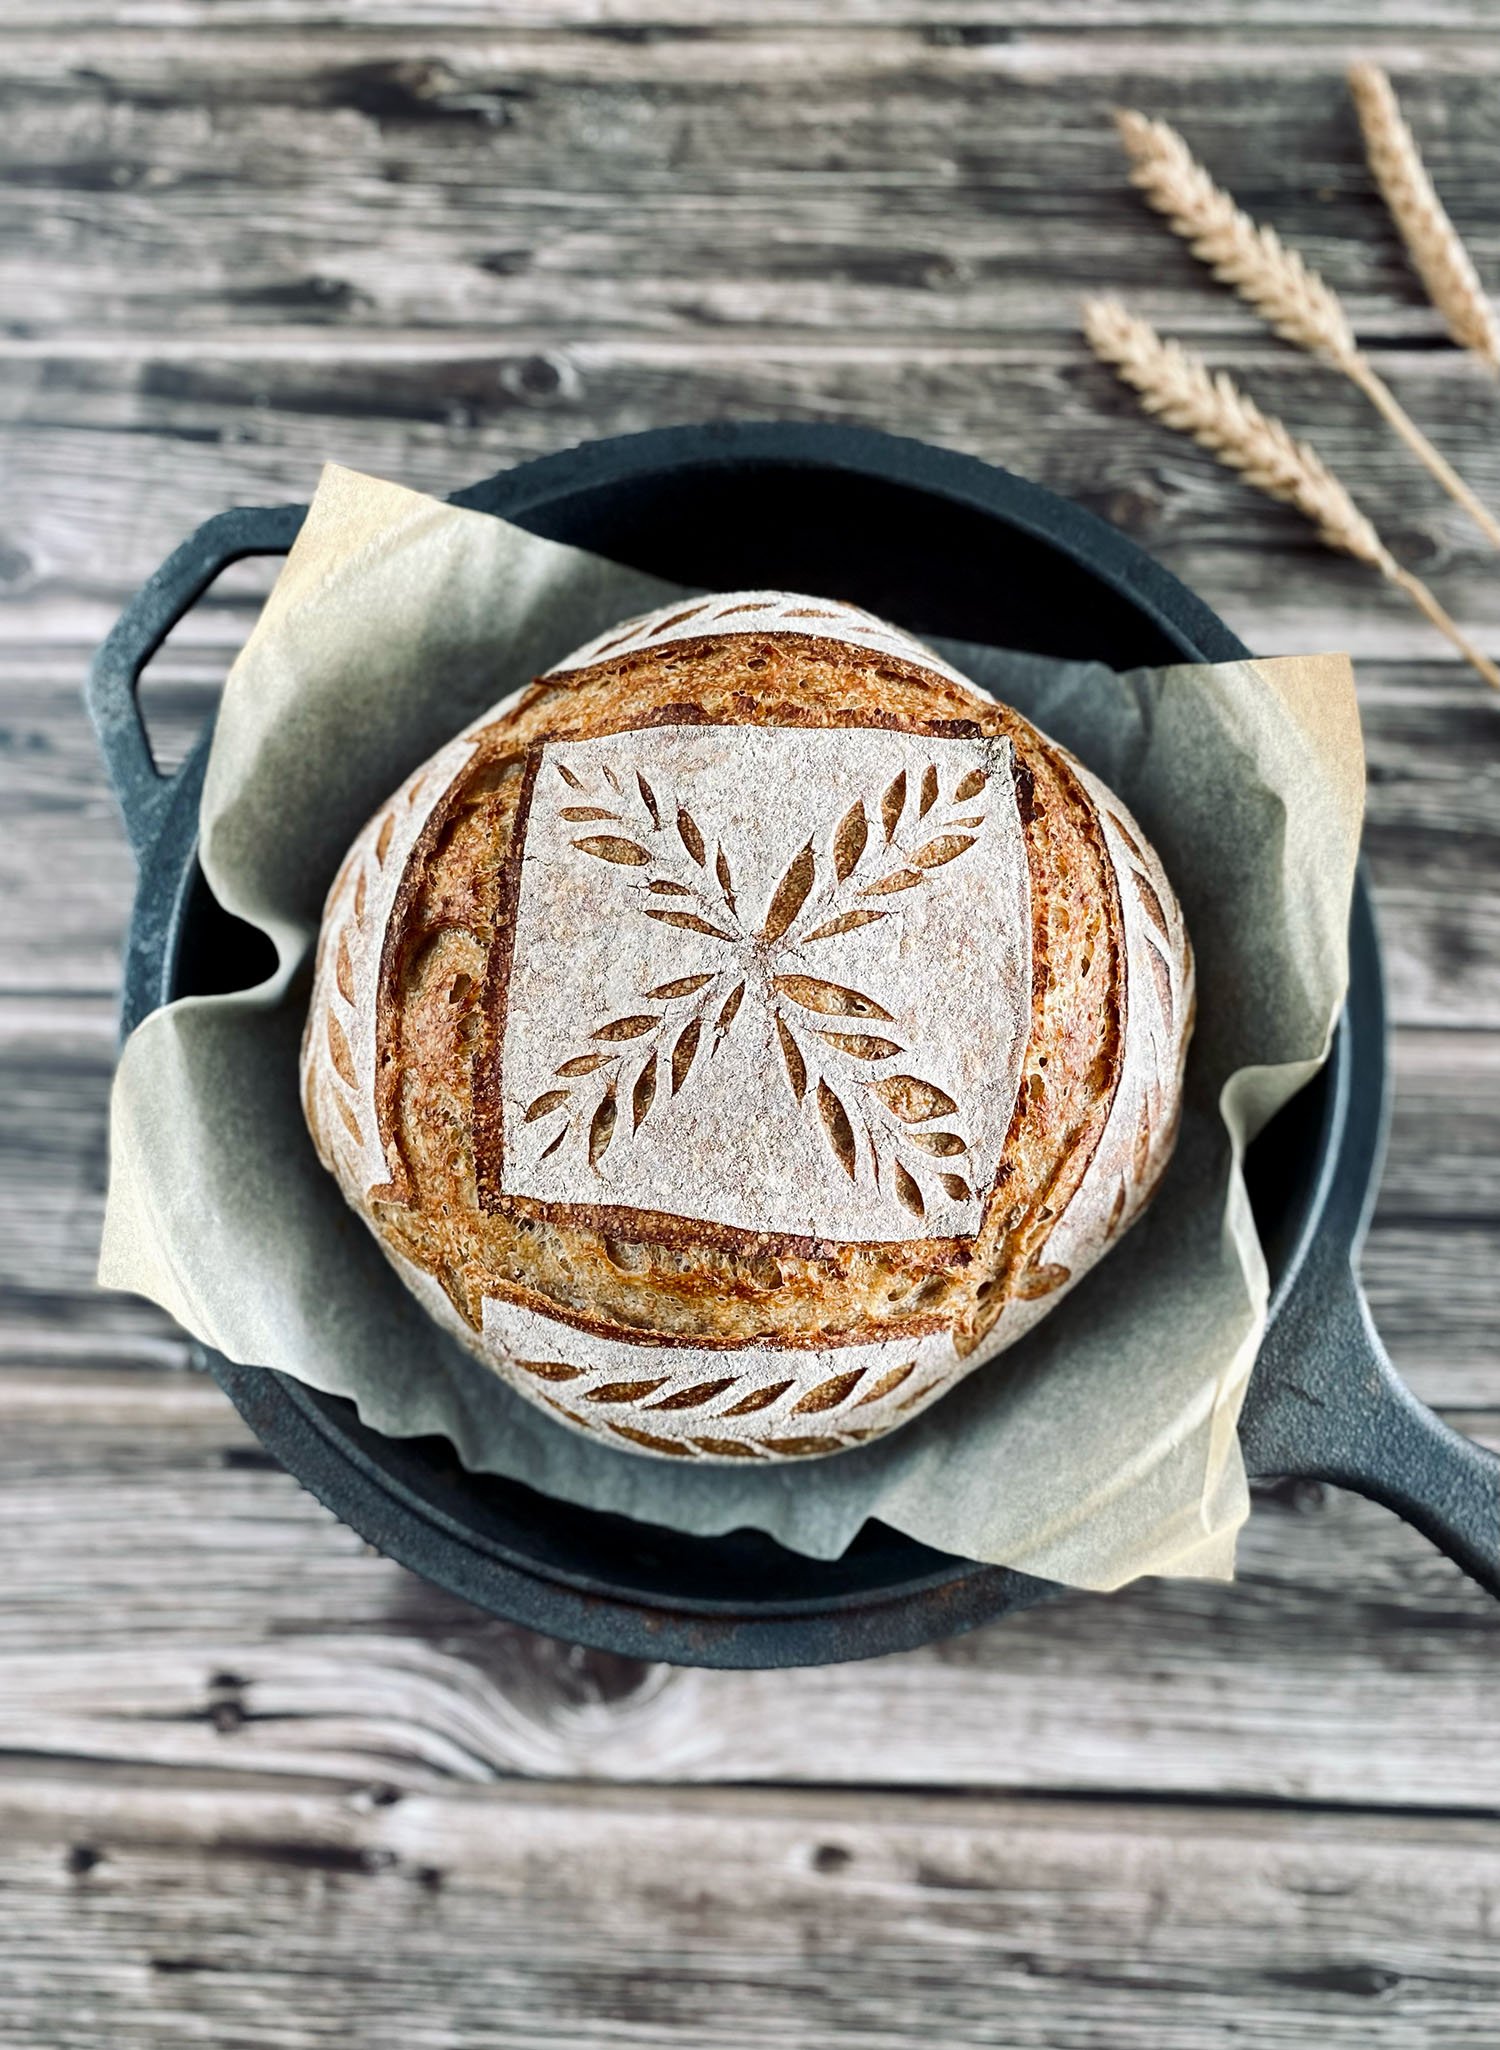
Why do I need to score the bread before baking?
Scoring helps the dough expand in the oven in a controlled way. It facilitates improved oven spring, good internal crumb structure, and appearance. If you didn’t score your dough, the steam trapped in the dough would find the weakest point and escape creating a burst in the crust.
Scoring is best done with a sharp blade (a lame) rather than a knife.
For most of our scoring we use Wire Monkey lames de boulouger. They can be purchased with a 10% discount via our store.
Is my bread over-proofed or under-proofed?
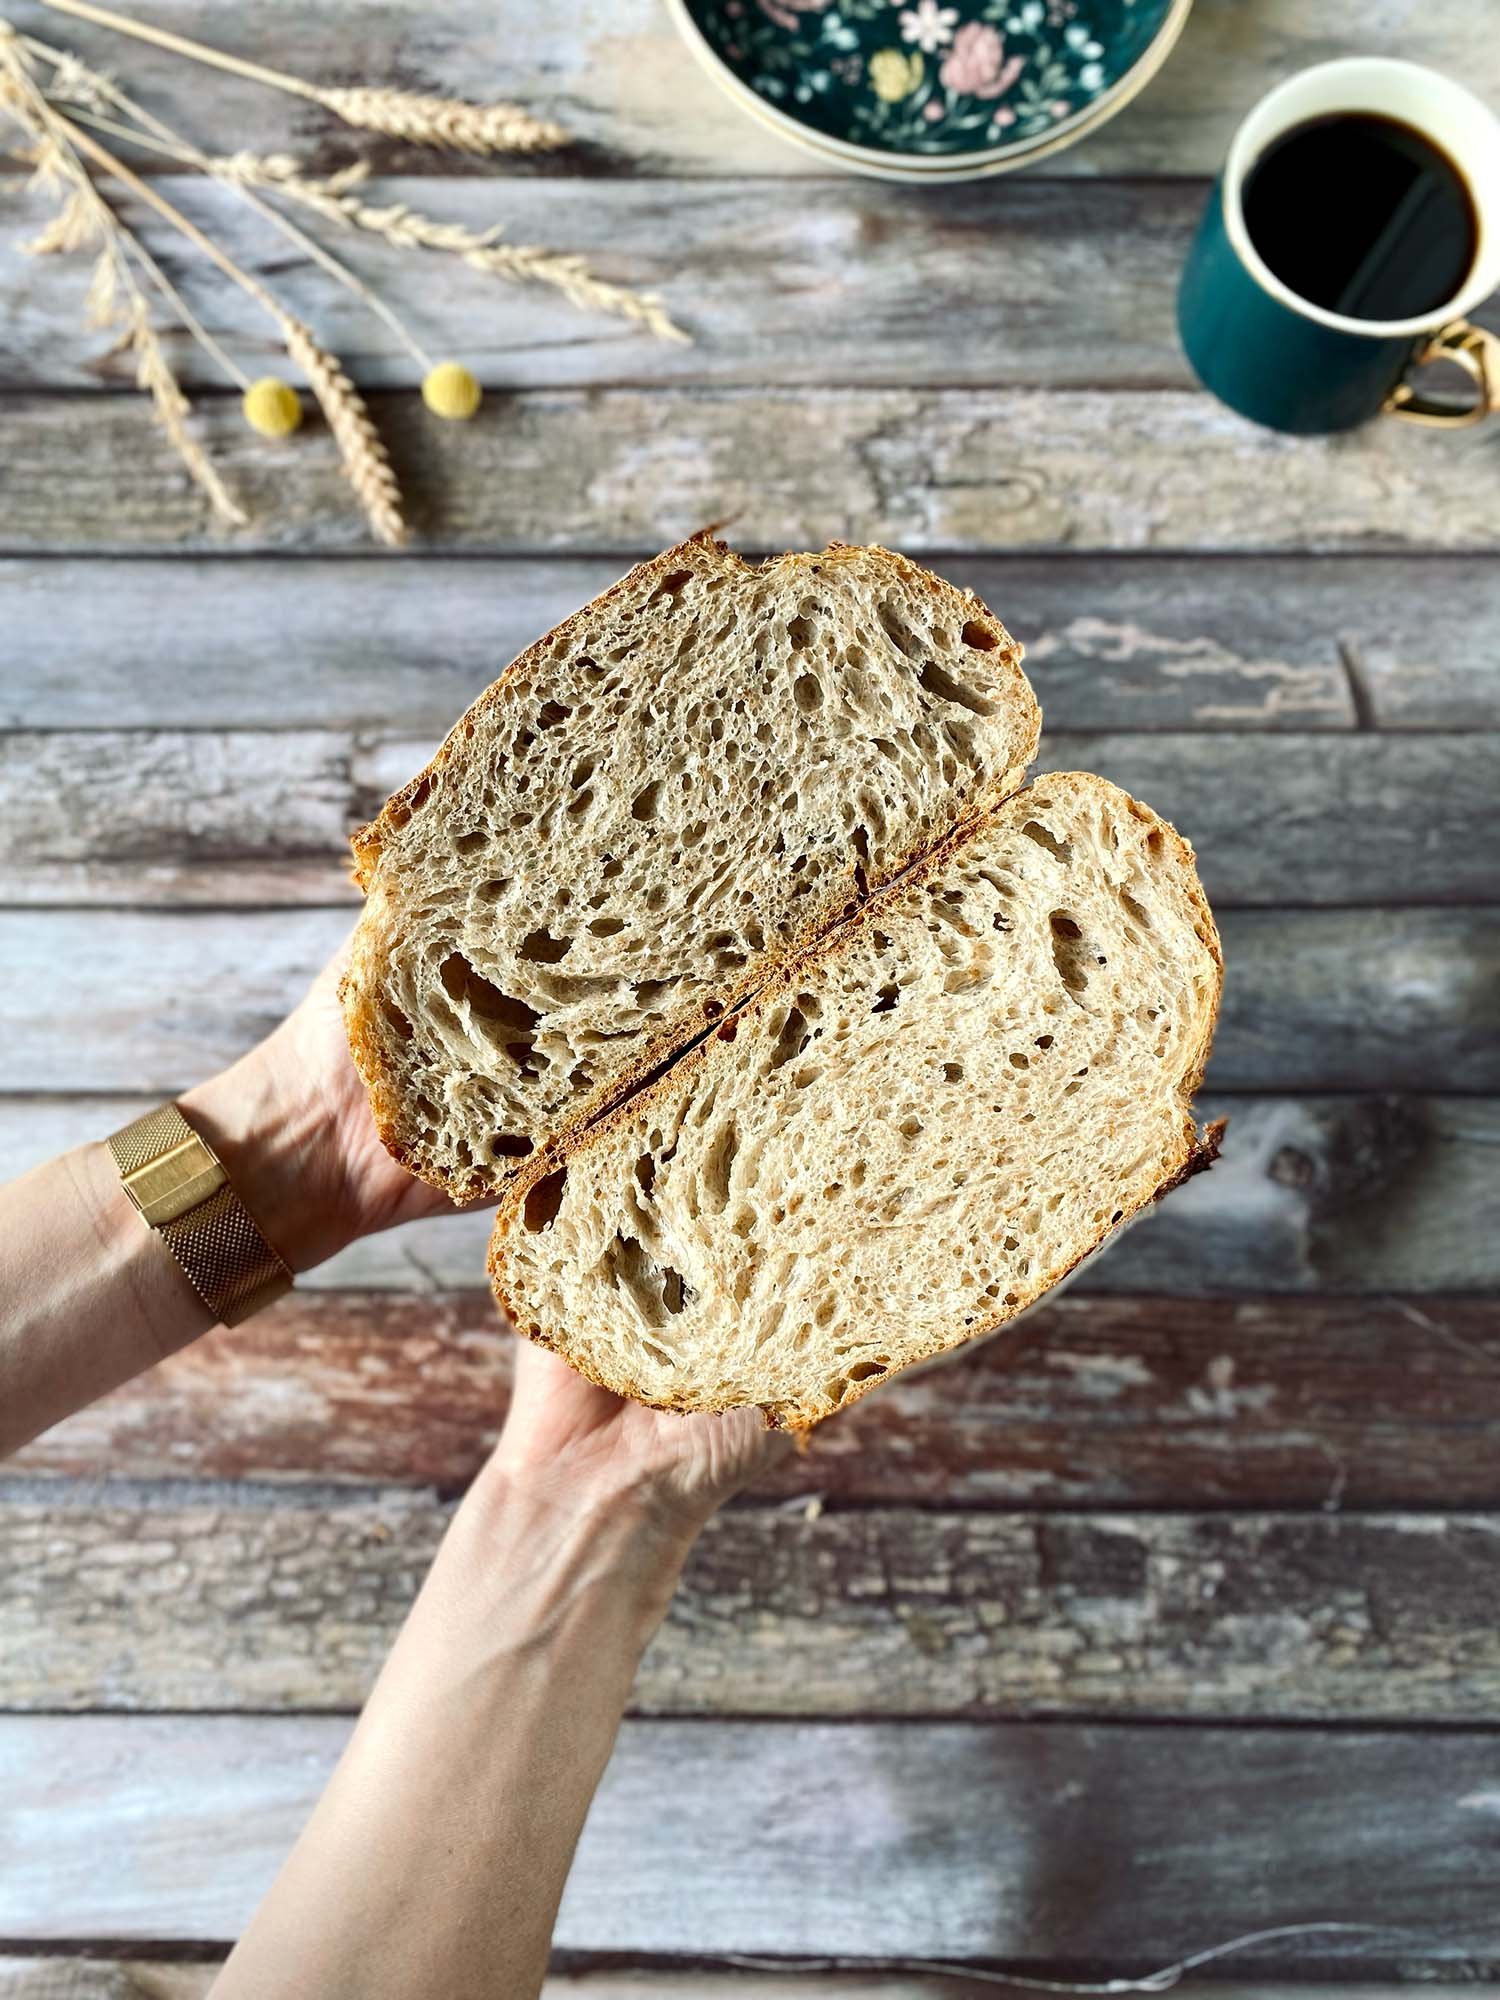
If the crumb looks tight or dense, then it’s probably under-proofed. Quite often you may also see one to two large bubbles in just one area of the crumb. The bread may look like it has risen a lot during baking, but after cutting through, the crumb is not consistent—may be quite dense in most parts and very open in one area.
The dough is usually over-proofed if your loaf didn’t get much oven spring and it’s rather flat, or your ‘ear’ didn’t develop well.
Why is my bread so dense?
There might be several reasons why your bread comes out dense, so you may need to tackle each of the scenarios one at a time to see what makes the difference in your case.
Your starter is not strong enough or not mature enough, or over fermented. When making a starter from scratch make sure you allow enough time for the starter to develop fully before baking your first loaf.
If the dough is under or over-proofed it may result in a rather flat and dense dough, and often a few very large holes in the crumb. The timings in your recipe (especially when it comes to bulk fermentation) will be just a guide and it will require practice to make it right.
Flour used—if you use all-purpose flour, the dough may not have enough strength to rise in the oven, resulting in a tight crumb. Using rye flour or a high percentage of wholegrain/wholemeal flour may also produce a denser texture. If this is the case, try adding more water to the recipe next time you bake.
Low baking temperature—make sure your oven is set to the temperature specified in the recipe.
Not enough steam during baking—if you don’t have a cast iron pan or Dutch oven to bake your bread in, make sure you add some steam during baking. You can place a pan with water below the bread to create steam. You can also add ice cubes to the Dutch oven to increase the amount of steam even further.
Too much bread—can I freeze it?
Absolutely, sourdough bread is great for freezing. To defrost it, just take it out of the freezer and leave it on the countertop for a few hours. You can also heat it up for 15-20min in the Dutch oven.
Related sections:
-
Starter Recipe
Learn how to make a sourdough starter from scratch.
-

Starter Maintenance
Our maintenance guide to keep your starter alive and healthy.
-

Beginner’s Bread Recipe
Step-by-step instructions to make your first sourdough bread.
-
Baking Tools
A list of the basic tools you’ll need in your sourdough making process.
-
Sourdough FAQs
Your most common sourdough questions answered.
-

Glossary Terms
A guide to understanding some of the terms used in sourdough making.